Thursday, November 28, 2013

Happy Thanksgiving!

We'd like to wish a happy and safe Thanksgiving to everyone out there! Enjoy the food, drink, and company. Here's a festive picture of cats for the occasion.


Thursday, November 21, 2013

Holiday Recipe: Eggnog Breakfast Bread Pudding

It seems like all the good holiday food is for dinner and desert, but it doesn't have to be that way. This holiday turn your breakfast into a delicious meal with "Holiday Recipe: Eggnog Breakfast Bread Pudding"!


Eggnog Breakfast Bread Pudding

Adapted from Marion Cunningham’s The Breakfast Book
Serves 8 to 10

1 (12 ounces) loaf French bread, sliced
4 ounces unsalted butter, room temperature
3 cups eggnog
2 cups whole or 2% milk
5 large eggs
4 egg yolks
1 cup sugar
Pinch salt
2 tablespoons bourbon (or 1 teaspoon pure vanilla extract)
Confectioners’ sugar and warm maple syrup, for serving

Generously butter the bread slices. Cut the buttered slices into 1-inch cubes and pile into a 2-quart baking dish.
Heat the eggnog and milk in a large saucepan over medium heat until bubbling gently but not boiling.
Meanwhile, combine the eggs, egg yolks, sugar, and salt in a large mixing bowl and whisk vigorously until light and frothy. Whisk one cup of the eggnog mixture into the eggs to warm them. Gradually whisk in the remaining eggnog mixture and the bourbon.
Pour the custard over the bread cubes, and gently mash down with your hands to make sure all of the bread gets saturated. Set aside for a minimum of one hour or chill overnight in the refrigerator.
Preheat the oven to 375°F. Bring a large pot of water to a boil (or alternately heat in the microwave in a microwave-safe measuring cup). Place the casserole dish inside of a large roasting pan and transfer to the oven. Carefully pour the boiling water into the roasting pan, so that it comes halfway up the sides of the baking dish.
Bake for approximately 45 to 50 minutes, until the custard is set and the top is light golden brown. Remove the roasting pan from the oven, then carefully lift the casserole dish out of the water (I use a very large metal spatula to lift it out of the water.) Allow to cool for 5 to 10 minutes before serving (although it is equally good at room temperature).
Sprinkle with confectioners’ sugar and serve with warm maple syrup.
    (Image credits: Nealey Dozier)


    Wednesday, November 13, 2013

    Bob Vila’s November ‘Must Do’ Projects

    Every home needs a little upkeep, especially for seasonal changes. As fall begins to fade away and the weather gets colder, check out these "Bob Vila’s November ‘Must Do’ Projects" to keep your place cozy and calm!

    Autumn kitchen


    Embrace the season

    It doesn’t take much to bring the natural beauty of the season indoors. Fill a bowl with acorns and pinecones to admire, cut leaf-covered branches to decorate a table or create an autumnal wreath to hang above the mantel — or outside on the front door. You’ll find plenty of clever ideas in “Budget Decor: 10 Ways to Dress Up Your House for Fall.”

    Seal those drafts

    A small crack or one leaky window might not seem like a big problem, but taken together, your home’s small drafts can add up to a lot of wasted energy dollars. Seal any gaps around electrical outlets, ducts, windows and doors with foam sealants, caulking or weather stripping.
    On the outside of your house, use caulking to seal anywhere different materials meet such as between the siding and the chimney, window and door frames and at the foundation. Even small gaps around cables, lighting fixtures, spigots, electrical outlets, dryer vents and air-conditioning pipes can add up to big air-infiltration problems and compromise your home’s thermal efficiency.
    To fill large gaps, expandable polyurethane foam works best, but use it sparingly since it can over-expand (and it’s a greenhouse gas producer as well). Water-based expandable foam works well in small cracks and won’t over-expand.

    Winterize your yard

    If you haven’t done so already, this is the time to winterize your seasonal equipment. Drain fuel from lawn mowers, leaf blowers and chain saws. Cover and store outdoor furniture and barbecues in a protected area. And, be sure to empty out pots, containers and planters, as soil left in clay pots outside can freeze and cause the pots to crack.
    Disconnect and store your garden hoses. If your home has a separate shutoff for external spigots, turn it off and drain the water from those spigots. If you have a sprinkler system, you may want to call in a professional company to blow out any leftover water in the underground lines.
    If it snows where you live, check to see that all of your snow equipment is close at hand, fueled up and ready for use. That includes snow blowers as well as shovels and roof rakes.

    Stress less on Thanksgiving day

    Did somebody mention turkey? If you are the one preparing the big meal, make your life easier by planning ahead. Clear countertops and empty the fridge so that you have ample space for food prep and storage. If you are worried about getting everyone around the table, look for ways to maximize your dining room.


    Original Article Here: http://www.zillow.com/blog/2013-11-08/bob-vilas-november-must-do-projects/

    Friday, November 8, 2013

    Cheap, Easy DIY Project: Stylish, Modern Bar Cart Hack for Under $40

    Forget going out to the bar, instead bring the bar to you! Check out this wonderful bar cart for your digs in "Cheap, Easy DIY Project: Stylish, Modern Bar Cart Hack for Under $40" and mix up a little something for yourself at the end of this long week!


    When it comes to bar carts, there aren't too many budget-friendly options that also happen to be fashionable. A bar cart at Target runs $100+, and you can't even find (an attractive) one at IKEA for less than $50. But this one above? It was built for under $40 (and to say "built" is really stretching it). The secret?
    Harbor Freight, the discount tool and equipment chain! This two-shelf steel service cart doesn't look like much at first, but for $37.99 (plus the inevitable sales and coupons that are always going on in the stores), it's really a steal.
    The guys at Primer classed it up a bit by adding wooden shelves (made from super thin and super cheap plywood from Home Depot), sanding and staining them, and hanging hooks for bar towels and bar tools.
    The result is a stylish, modern, industrial bar cart that only took an afternoon to make (and that includes picking it up from the store). You can customize it even further by painting the steel itself. Check out the tutorial on Primer!
    (Image credits: Andrew Snaveley for Primer)


    Original Article Here: http://www.apartmenttherapy.com/cheap-easy-diy-project-stylish-modern-bar-cart-hack-for-under-40-primer-magazine-196941

    Wednesday, October 30, 2013

    Back to Basics: 8 Warm & Cozy Recipes with Cinnamon

    There is nothing like walking out of the cold and into a warm house with delicious smells and treats. Winter is coming soon, so prepare yourself with "Back to Basics: 8 Warm & Cozy Recipes with Cinnamon" below!

    51bcc50bd9127e25bf00140c._w.540_s.fit_


    After a few years of pushing aside plain cinnamon in favor of more exotic spice blends, I've found myself pulling out the cinnamon bottle again and again lately. No fancy spices, no complicated blends, just the comforting taste of buttery cinnamon toast, warm cinnamon rolls and snickerdoodles. But the cinnamon options don't end there — from apple cinnamon mini monkey breads to spicy lamb and cinnamon-roasted eggplant pies, these eight recipes prove that old, familiar cinnamon doesn't have to be boring.
    (Images: See linked recipes for full image credits)


    Original Article Here: http://www.thekitchn.com/back-to-basics-8-warm-cozy-recipes-with-cinnamon-196697

    Thursday, October 24, 2013

    Haunted Houses in Albuquerque

    Looking for some spooky haunted houses for some Halloween thrills this year? Look no further! Check out this list of places you can go to for scare-tastic times!


    Not only does Albuquerque have some haunted houses great for visiting during the Halloween season, there are also ghostly events happening year round. Take a ghost tour and visit some of the oldest ghosts in town.
    AbqBoo
    The free, non-professional haunted house is open October 31 and November 1. You'll find haunted halls, an animated graveyard, singing busts, deadly pirates and more. The batcave has the television show batmobile.
    Dragon's House of Terror
    The gruesome foursome are back: the clown butcher, Michael, Jason and Pumpkinhead. The Rio Ranchohaunted house will be open October 4 through the 31st,: October 4, 5, 6, 11, 12, 13, 17, 18, 19, 20, 23, 24, 25, 26, 27, 28, 29, 30 and 31. Located at 801 Loma Colorado, the haunted house is next to the Blades complex. Adult admission $15, children under 12, $10.
    The Haunted Scarecrow
    Take a journey through the catacombs of Warehouse 508 in downtown Albuquerque. The haunted house is open October 18, 19, 25, 26, 30, November 1 and 2, beginning at dark each night.
    House of Freakz and Beatz
    The haunted house and costume after party experience is at Gravity nightclub from September 27 through October 31. Enter to explore the Lonely Cabin, Graveyard, Psych Ward, Mystery Maze and more. Survivors of the haunted house can attend the monster mash at the costume after party. Every Thursday, Friday and Saturday from 8 p.m. to midnight. October 21 and 31 are for 21+ only; other nights teens are admitted. $25 haunted house, $15 costume after party, $40 both. Cash prizes for costumes in categories such as scariest, funniest, and more.
    Ghost Tours of Old Town
    The ghosts of Old Town are around all year, but at Halloween, the tours through the haunted houses are even better. Learn about the history and basics of hunting for ghosts in this 90 minute tour. Chilling. Tours are nightly at 8 p.m., and and ghost hunting tours begin at 9 p.m.
    McCall Haunted Farm
    Legend has it that Farmer McCall did the unspeakable in the 1970s, first murdering his family, and then tourists. The legend continues at the cornfield, the butcher shop, and in the flashlight maze. Prepare to be frightfully scared. Recommended for those over 13 years of age. This year, there will be a Zombie Hunt. Shoot live zombies with a paintball gun. The hauntings begin September 27 and run Fridays and Saturdays through October until October 26. The farm is in Moriarty, near the McCall's Pumpkin Patch.
    NM Slaughter House
    This special house features a demented couple and a tour through secret passages and hidden walls where demented children can be found. Slaughter House is downtown at 610 Central. Open September 27 through November 2.
    Quarantine
    The dead have risen. The problem--besides them being dead--is they're hungry. Society is breaking down and the only one way out is through Quarantine. Blackout Theatre Company has created a haunted house staffed by professional actors. Audience members enter the quarantine in small groups with an actor and take on the roles of people trying to survive a zombie apocalypse. Quarantine is located at QueLab, 7th Street and Haines. Survive it from October 10 through the 31st, Thursday through Sunday from 7 to 10 p.m. and every day October 24 through Halloween beginning at 6 p.m. Suitable for anyone 13 and older.
    Realm of Darkness Haunted Asylum
    Realm of Darkness opens September 27. You'll find a maze of over 10,000 square feet to scare you at every turn. Perfect for the westside and Rio Rancho communities, it's located within Cottonwood Mall.


    Original Article Here: http://albuquerque.about.com/od/attractions/a/Halloween.htm

    Wednesday, October 16, 2013

    DIY Halloween


    Check out these great Halloween decorations that you can make yourself. Here are ten great decorations that are affordable and fun! There are outdoor and indoor options that will sure to make your guests enjoy the party. You can learn more at Money Crashers.

    1. Backyard Cemetery

    halloween rip cemeteryThis classic Halloween decoration idea turns your yard into a creepy cemetery. Use reclaimed materials to create a free graveyard. To create your haunted cemetery, cut different shapes out of cardboard and paint them to look like aging tombstones. Once they dry, you can arrange them on the lawn to look like a miniature graveyard.
    You can also use the tombstones to denote a haunted pathway for trick-or-treaters. As they approach your front door, they have to pass by the tombstones, making for a thrilling Halloween nighttime walk.
    Directions
    1. Flatten several shipping boxes.
    2. Use a Sharpie to draw tombstone shapes. I made a few rectangular, cross, and oval tombstones to give my graveyard some variety.
    3. Cut the shapes out of with a pair of scissors.
    4. Paint the shapes a dark grey and allow the paint to dry.
    5. Once dry, add on sayings like “R.I.P” to the front of each tombstone. Glue a wood or plastic yard stake to the back of the tombstone and plant it into the ground.
    By using real wood, you can partially waterproof the tombstones, so they last for more than one Halloween season. The project works best if you use thin pieces of composite wood, which you can buy at any home improvement store. The thin pieces are easier to cut and stand up better in the grass.
    Pro Tip: You can blend white paint onto the edges of the tombstone, or glue on some artificial moss, found at craft stores, to make them look more aged and authentic.

    2. Haunted Trees

    Make your yard come alive with this spooky craft. If you have trees in your yard, you can use oven-baked clay to give the trees spooky faces. Simply create a pair of eyes, a nose, and a mouth for each tree, and attach them to the trunks.
    Place a portable radio or speakers near the tree and play your favorite eerie soundtrack to draw even more attention to your haunted trees.
    Directions
    1. Purchase oven-baked modeling clay, like Fimo or a similar brand. You can buy modeling clay for about $12 a pound online. Buy colored clay, such as green, brown, or black, to give the face more character and to make each face more noticeable.
    2. Create basic shapes for the eyes, nose, and mouth. Use a butter knife to carve out more details like eyelids or teeth, and bake them in the oven.
    3. Use removable putty or double-sided hanging tape to arrange the face on the tree.
    Pro Tip: You can purchase a clay glaze at most craft stores that prolongs the life of thes faces. The glaze adds a protective coating, which keeps them safer in the rain.
    halloween trees

    3. Reusable Jack o’ Lanterns

    Jack o’ lanterns are staple Halloween decorations, but some of us would rather not deal with cutting and carving pumpkins every year. Hobby and craft stores sell artificial pumpkins you can carve and light. Best of all, you can store them for next season.
    Directions
    1. Purchase an artificial pumpkin from a hobby store. They come in several different shapes, colors, and styles, so pick one you think will look best at your front door.
    2. Use an Exacto knife to carve a small hole in the bottom of the pumpkin, and to create a design on the front.
    3. After you finish the design, use a small piece of sandpaper to gently sand down any rough edges.
    4. Place a small flashlight or electric candle in the bottom to make your design glow, and pop your Jack o’ Lantern on the front porch.
    5. If you use small reusable jack o’ lanterns, you can place them in the windows of your home, to cast an eerie light on your front yard.
    Pro Tip: If you’re not artistically inclined, you can use a stencil to create a Jack o’ Lantern design. A few websites offer free stencils you can print.
    Places to get free Jack o’ Lantern Stencils:
    • Celebrating Halloween has a selection of traditional Halloween designs you can print.
    • Stoney Kins has an eclectic mixture of stencils, offering everything from Cookie Monster to Humphrey Bogart, and they’re free to print and use.
    • Pumpkin Glow has a large selection of “un-Halloween” stencils, which includes everything from commercial icons to famous people.
    • Better Homes and Gardens has a large selection of free stencils, ranging from the classics to different breeds of dogs.
    jack o lanterns

    4. Coffin Cooler

    With a little imagination, and some wood and nails, you can create your own life-sized coffin, which you can use in a dozen different ways. I turned mine into a cooler to hold drinks for an outdoor party. My neighbor used his to create a gravedigger scene in his front yard on Halloween. You can also use your coffin for a spooky planter or as a table during a party.
    For Halloween, use the coffin to strike fear into the hearts of your neighbors, by hiding someone inside, who pops out from time to time to spook the older trick-or-treaters. Talk to friends and family members to find free 4×4 boards for this project; someone you know likely has a stack of these boards collecting dust in the garage.
    Directions
    1. You need seven 4×4 boards, varying in length depending on the size of coffin you want. Two boards make up the sides, one board makes the bottom, and you’ll cut the other four to fit the shape of the coffin.
    2. Cut the bottom board into a coffin shape. You can use Google images to get an idea for the design.
    3. Cut two boards to fit the length of the coffin. The boards should extend from the first angle on the top to the bottom.
    4. Cut two smaller boards so they fit at an angle on each side of the top.
    5. Cut the last two boards to fit the top and the bottom.
    6. Nail each piece to the bottom board, starting with the sides.
    7. Paint the finished product black, brown, or grey to make it look more authentic.
    Pro Tip: If you plan to use the coffin as a drink cooler, line the inside with black trash bags. The trash bags help make the coffin more waterproof when the ice starts to melt.
    halloween coffin doll

    5. Giant Spiders

    Spiders fit right into a spooky Halloween theme. You can transform a few black trash bags into a giant spider that fits on your front porch, or up in a tree. You can also make multiple giant spiders and cluster them across the front and sides of your home.
    Directions
    1. You need nine black trash bags and stuffing such as newspaper, left over packing materials, or even leaves.
    2. Fill one trash bag with stuffing and tie it closed to create the spider’s body.
    3. Hold the second trash bag on its side and fill the length with stuffing.
    4. Wrap the empty bag around the stuffing several times, so that it looks like a spider’s arm, and secure it with a tie. Repeat this for the other seven legs.
    5. Use a glue gun to secure the legs to the body.
    Pro Tip: You can cut off the bottom of Styrofoam cups and glue them onto the body to make eyes.
    plastic bag spider halloweenGiant Spider – WatsCraft

    6. Ghost-Lit Walkway

    If you have a collection of milk jugs in your recycling bin, you can create a ghost-lit walkway that your trick-or-treaters will love. Look online to get inspirations for designing your ghosts’ faces. The Scream mask makes an instantly recognizable, scary ghost face that you can easily replicate on your milk jugs.
    Directions
    1. For this project, you need several milk jugs, some black construction paper, and enough artificial candles to fill the jugs.
    2. Wash and dry each milk jug.
    3. Once dry, use a knife to cut a small hole in the bottom of each jug.
    4. Make ghost faces for each jug by cutting out a pair of eyes, a nose, and a mouth from the black construction paper.
    5. Turn the jug so that the handle faces the back. Glue the faces onto the front of the jug and place an artificial candle inside.
    6. Line the jugs along your walkway and turn the candles on. The jugs light up, illuminating the faces.
    Pro Tip: You can also use white Christmas lights to light up the ghosts. Line the ghosts along the pathway, and insert a handful of the string lights inside each jug.
    milk jug ghost walkway halloweenSpirit Jugs – eighteen25

    INDOOR HALLOWEEN DECORATIONS

    Indoor decorations are great way to make a Halloween party feel more authentic. In one afternoon, you can turn the inside of your house into an eerie mansion.

    7. Floating Hands

    You can turn clear plastic gloves into severed hands, and then place them around your house, sneak them into a chip bowl, or even make a garland out of hands. Whenever possible, use a fake hand to shake hands with arriving guests, and then release the hand and feign dismay.
    Directions
    1. Fill a plastic glove with tissue paper, popcorn, or small shredded paper waste. You can also open up the gloves and fill them with freshly mixed JELL-O, for jiggly, realistic-feeling hand.
    2. Tie the open end of the glove with a clear elastic band to secure its contents.
    3. If you want to hang your hands, slide a paperclip through one loop of the elastic band.
    Pro Tip: You can fill the plastic glove with shredded red scrapbook paper to create a “bloody hand,” or tan or brown scrapbook paper to create a more realistic-looking hand. You can also fill these hands with candy corn to create Halloween-themed treat bags.
    candy corn popcorn glovesCandy Corn Popcorn Hands – Kimbo’s Crafts

    8. Halloween Garland

    A simple Halloween banner is an artsy and cheap way to add some festive decorations to the inside of your house. Depending on the look you’re going for, you can make your garland eerie or more fall-oriented and cheery.
    These instructions focus on making a garland with a message, but you have unlimited options when creating your Halloween garland. String paper pumpkins, ghosts, and vampires to make an eerie garland for your party. Use oversized paper cutouts of candy corn, candies, and popcorn for a garland over the snack table.
    Directions
    1. Decide on a saying for your garland. For example, you can do a simple “Happy Halloween” or “Trick or Treat.”
    2. Select a color palette for the paper. If you want an eerie look, black, red, and green work well. If you want a festive look, brown, orange, red, and purple work nicely.
    3. Cut the paper into small squares or triangles, until you have one piece for each letter of your saying.
    4. Use paint markers or a sharpie to draw each letter on to the paper.
    5. Punch a small hole in the top with a hole punch. Slide a paper clip through each hole.
    6. Attach the letters to a long piece of twine.
    7. Hang your garland over a doorway or a mantle.
    Pro Tip: You can add decorations between each letter block to give the garland more detail. For example, I wrapped artificial spider webs between the letter blocks on my garland.
    happy halloween candy

    9. Specimen Jars

    With a few leftover glass jars, you can convert a table into a scientist’s lab. By tossing just about anything you can imagine into a glass jar with some food coloring, you can quickly create a cheap Halloween decor piece. Look online for craft ideas for fingers, eyeballs, and other body parts to fill your specimen jars. Make the jars and the rest of your decor seem even creepier by using mood lighting. Turn off overhead lights or switch them out with colored light bulbs, to increase the creepiness factor in your home.
    Directions
    1. Collect a few glass jars in different sizes, such as mason jars, spaghetti jars, or old baby food containers.
    2. Find an object to place in each jar. For example, I popped the head off an old doll and stuck it inside a mason jar.
    3. Wash and dry the jar. Place the object inside.
    4. Fill the jar with water and drop in two drops of food coloring. The food coloring will make the object look like a specimen at a lab.
    Pro Tip: Around the Halloween season, hobby stores sell small, plastic party favors. These party favors, including miniature skeletons, eyeballs, and severed limbs, all work well in specimen jars.
    halloween specimen jarsSpecimen Jars – Paper Dolls for Boys

    10. Flying Bats

    With a few pieces of felt and some tape, you can have a gang of bats flying around your living room in no time. You can easily make bats and put them up just about anywhere.

    Thursday, October 10, 2013

    Recipe: Golden Beet and Barley Salad with Rainbow Chard


    Rainbows are famous for having pots of gold in them, but how would one taste? If you're curious then check out "Recipe: Golden Beet and Barley Salad with Rainbow Chard" below!

    Recipe: Golden Beet and Barley Salad with Rainbow Chard


    Golden Beet and Barley Salad with Rainbow Chard

    Serves 8 to 10 (makes about 10 cups)
    4 medium golden beets, tops removed (see Recipe Note)
    1 cup dry pearl barley
    1/2 large red onion, minced (about 1 cup)
    1 bunch (about 1 pound) rainbow chard
    3 tablespoons lemon juice from 1 lemon, divided
    4 ounces feta, crumbled, plus extra for serving
    2 1/2 tablespoons extra-virgin olive oil, divided
    Salt and pepper to taste
    Heat the oven to 450°F. Loosely wrap the beets in foil and roast them in the oven until they are just fork tender, 30 to 45 minutes. Let cool enough to handle, then peel and dice the beets into 1/2-inch cubes.
    Meanwhile, cook the barley. Bring 4 cups of water to a boil. Add the barley and 1/2 teaspoon of salt. Reduce to a simmer, cover, and cook until the barley is tender, about 30 minutes. Drain the barley and return it to the pan. Cover with a clean dishtowel until ready to use.
    Place the onions in a small bowl and cover with cold water. Set aside to soak for at least 30 minutes.
    Wash the chard and pat dry, but leave some moisture clinging to the leaves. Strip off the leaves, stack them in a pile, and slice them into 1/2-inch ribbons. Set aside. Dice the stems into small bite-sized pieces and set aside.
    Heat 1 teaspoon of olive oil in a large skillet over medium heat. SautƩ the diced chard stems with a pinch of salt until they start to turn translucent around the edges, 6 to 8 minutes. Add the ribboned chard leaves, half of the lemon juice (1 1/2 tablespoons), and a healthy pinch of salt. Continue to cook, stirring gently, until it is bright green and has wilted down, another 4 to 5 minutes. If the pan is very dry, add a few tablespoons of water so the chard can keep steaming.
    Drain the red onion from the soaking water. Combine diced beets, cooked barley, chard stems and leaves, and red onion in a large mixing bowl. Let everything cool to room temperature, then stir in the feta. Whisk together the remaining lemon juice, 2 tablespoons of olive oil, and 1/4 teaspoon salt. Drizzle the vinaigrette over the salad and stir to evenly coat all the ingredients.
    Taste the mixture. As needed, add salt 1/4 teaspoon at a time. Add pepper to taste.
    Serve family-style in a large bowl or in individual bowls with extra feta sprinkled over the top. Leftovers will keep refrigerated for one week.

    Recipe Notes:

    • If your beets come with their tops still attached, you can substitute them for all or part of the chard.
    (Images: Emma Christensen)


    Original Article Here: http://bit.ly/13bXLvN

    Thursday, October 3, 2013

    DIY Project: Make Your Own Slatted Console Table


    This DIY project is versatile in that it can fit in most any room or situation. Not only that, but it also comes with its own free instructions! Check out "DIY Project: Make Your Own Slatted Console Table" below!

    DIY Project: Make Your Own Slatted Console Table

    We've featured Ana White before, like when we shared her creative instructions for building your own backyard see-saw! I stumbled across her newest project while looking for a thin console table to fit into our foyer. I love the idea of making our own furniture — now we just have to find an area that suits the building process! 
    In her newest tutorial, with detailed PDF instructions, Ana guides us through making our very own modern-style slatted console table: a perfect addition to a narrow hallway or entry way. Plus, (here's the part I love) the instructions are free! I can't wait to get started on this one — perhaps a before and after is in order! (My living room before and after it is piled high with 2x4s and nails, that is.)

    Head over to the full tutorial and instructions at Ana White Homemaker, and check out her other projects as well.

    (Image via Ana White Homemaker.)


    Original Article Here: http://bit.ly/10Q8D10

    Thursday, September 26, 2013

    7 Simple Tips To Help You Declutter


    Sometimes we sit down in our homes and think "How did I end up with all of this stuff!?" Whether its a lack of organization, or just a lot of trinkets here and there, clutter can build up over time. If you've decided that you've had enough, check out "7 Simple Tips To Help You Declutter" below!


    1. Set the mood. 
    If you have a diffuser, fill it with uplifting essential oils such as grapefruit, lemon, or Elevation blend. These pleasant aromas will help you tackle the emotions that would otherwise distract you and keep you from accomplishing your goals. Our sense of smell is the only sense directly related to our brain, and aromatherapy can really change your mood!
    2. Get the tunes going. 
    What kind of music will get you revved up or in great spirits?
    3. Set a goal. 
    Begin small. One room, one closet or even one pile at a time. If you think about the entire picture, you may get overwhelmed. At least I do.
    4. Take inventory. 
    Get a piece of paper and take note of what you have and what you can get rid of. My rule of thumb: if I haven't worn it, or used it in at least a year, it's time to say bye-bye.
    5. Think about the most efficient way to organize. 
    How would you like things to be displayed? Do you need hangers or organization mechanisms such as dividers, shelving, boxes or crates? Get those before you start so that you have somewhere to put your items. (It's imperative that you plan ahead and get what you need before you tackle that clutter).
    6. Complete one project at a time. 
    Stay put and complete one project at a time. Don’t move into a second area before you finish the first. If you're reorganizing a pantry, stay there. If you're reorganizing the folders in your mail program, don’t go into the pantry. Starting in smaller piles will again, keep you from getting overwhelmed.
    7. Don’t get distracted
    Leave your phone out of the room. Leave all media out, with the exception of music. Keep the tunes flowing. Only leave for bathroom breaks and do it until it is done.
    Photo Credit: Shutterstock.com


    Original Article Here: http://bit.ly/19VysOu

    Wednesday, September 18, 2013

    5 Make and Freeze Dinners


    Sometimes there's just no extra time to cook up a complicated meal, so having ones already prepared to eat can be incredibly convenient in a pinch. Check out "​5 Great Meals to Make Ahead and Freeze" to make sure that you'll always have something to chow down on even if you're short on time.


    Soups

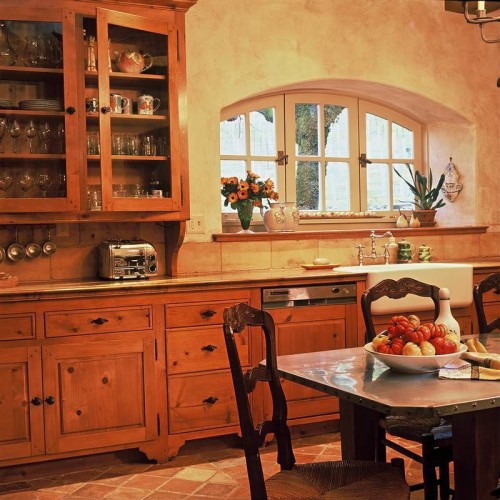
    While I grew up eating canned soup, that’s not been the case for my kids. The canned variety is generally oversalted, oversweetened, and overpriced. Since it’s so easy to make my own, there’s really no reason not to.
    I regularly prepare our favorite soups, sometimes two or three varieties at a time, and freeze them in family- and individually-sized portions. It’s super easy to grab a few different pints of soup from the freezer for a quick lunch or supper. They pack well to work as well to reheat in the microwave.
    Soups are great to pack on vacation, send to college with your child, or fill the freezer of a new mom or aging parent. Soup is good food. Particularly if you make it ahead of time and stash it in the freezer.

    Casseroles

    Casseroles are an ultimate comfort food. It speaks my husband’s love language to pull a pan of enchiladas out of the oven. For my kids, it’s my famous Chicken Pot Pie or Lawnmower Taco. It’s even easier to treat their tastebuds when I’ve made a bulk batch of these and stashed them in the deep freeze.
    Consider your favorite lasagna, enchilada, quiche, egg bake, or other casserole. Next time you prep it, make two (or more) and freeze the extras. It really doesn't take that much more time, but you'll reap the rewards later.

    Marinated or Cooked Chicken

    Boneless, skinless chicken breast is one of the most economical proteins here on the West Coast where it’s regularly less than $2/pound. I snatch up big flats of chicken and do one of two things: I package trimmed breast fillets with marinade in a ziptop freezer bag, or I cook it up by poaching or grilling and then I freeze the cooked results.
    The fruit of my labor is an easy, ready-to go protein. I can thaw the marinated chicken in the fridge overnight and have it ready to throw on the grill at dinnertime. I can thaw the cooked chicken and toss it into salads, stir it into soups, or tuck it into sandwiches.

    Taco and Burrito Fillings

    We’ve always been big taco and burrito fans, so it makes sense to keep the fillings on hand for quick and easy suppers. By cooking up bulk batches of seasoned taco meat, pinto beans, or carnitas, I’ve got the makings of many a great dinner. Since these items are already cooked, I can quickly thaw and reheat, lay out tortillas, taco shells, chips, rice or even fried potatoes, and an array of toppings, and dinner is served before I can make a run for the border.
    5 Great Meals to Make Ahead and Freeze

    Apple Pie

    Apple pie is a meal, right? Well, at our house it is, at least on the first day of school when I serve apple pie for breakfast. While it may not be your typical "meal," it sure is nice to have a stash of pies in the freezer.
    Every fall, I prep as many pies as I can and store them in our big freezer. This allows me to surprise my family with a fresh-baked pie on cold fall evenings. It takes the load off my Thanksgiving Day prep work since I only need to slide them into the oven on Wednesday night. And it brings a comfort and a touch of sweetness to savor the flavors of fall throughout the cold winter months.
    When I’ve got my freezer stocked with these five of my favorite things, all’s right with the world. I can surprise my family with their favorite foods. I can pull a quick dinner off in less time than it would take me to find my car keys and latch some car seats. I can rest a little easier, knowing that if other plans don’t go my way, at least dinner will.

    Check out Jessica's book on freezer meals

    Visit Jessica's family cooking blog:

    (Images: Jessica Fisher)


    Original Article Here: http://www.thekitchn.com/5-great-meals-to-make-ahead-and-freeze-193994

    Twitter Delicious Facebook Digg Stumbleupon Favorites More